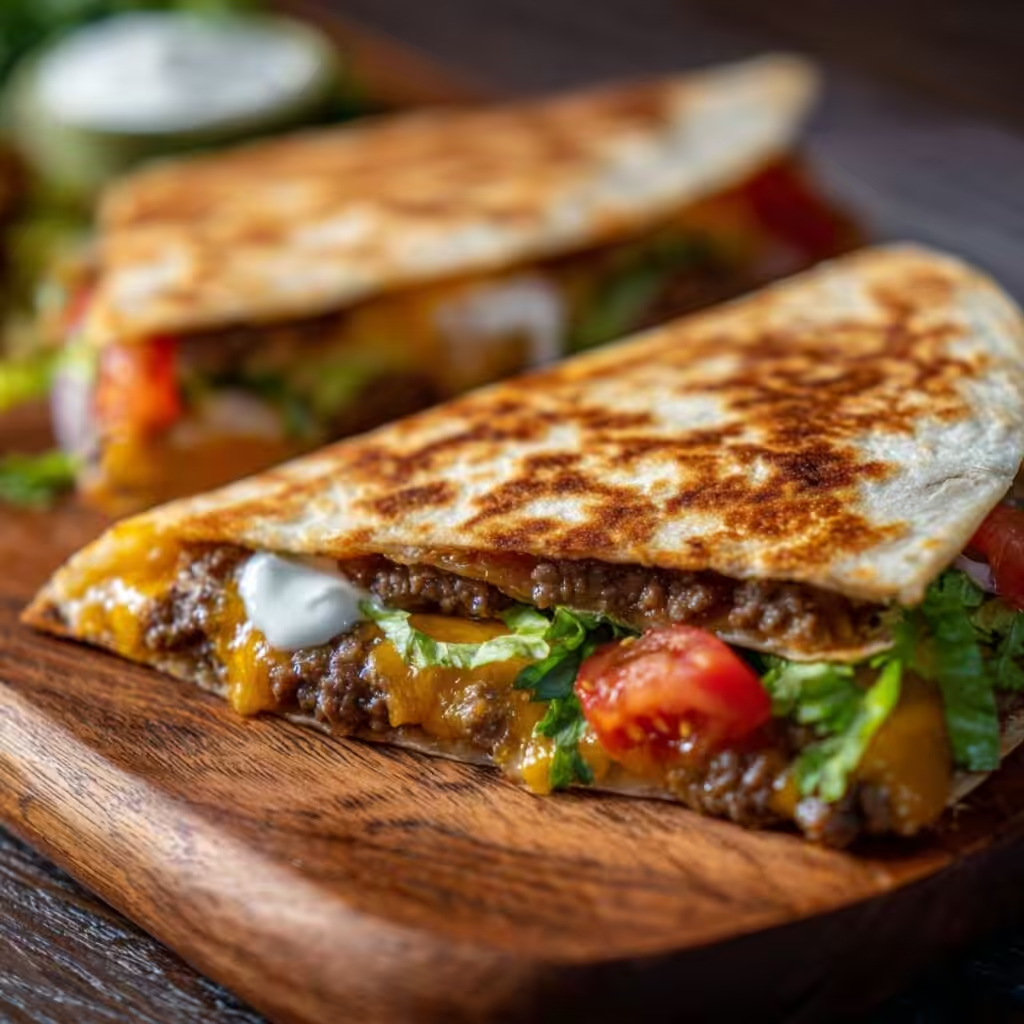
There are certain cravings that hit hard—the pull of a juicy, smash-style cheeseburger with its crispy edges and melted cheese, or the irresistible crunch of a griddled quesadilla. But what if you didn’t have to choose? What if you could capture the nostalgic, savory essence of a classic diner burger inside the golden, buttery, crispy shell of a Mexican-inspired tortilla?
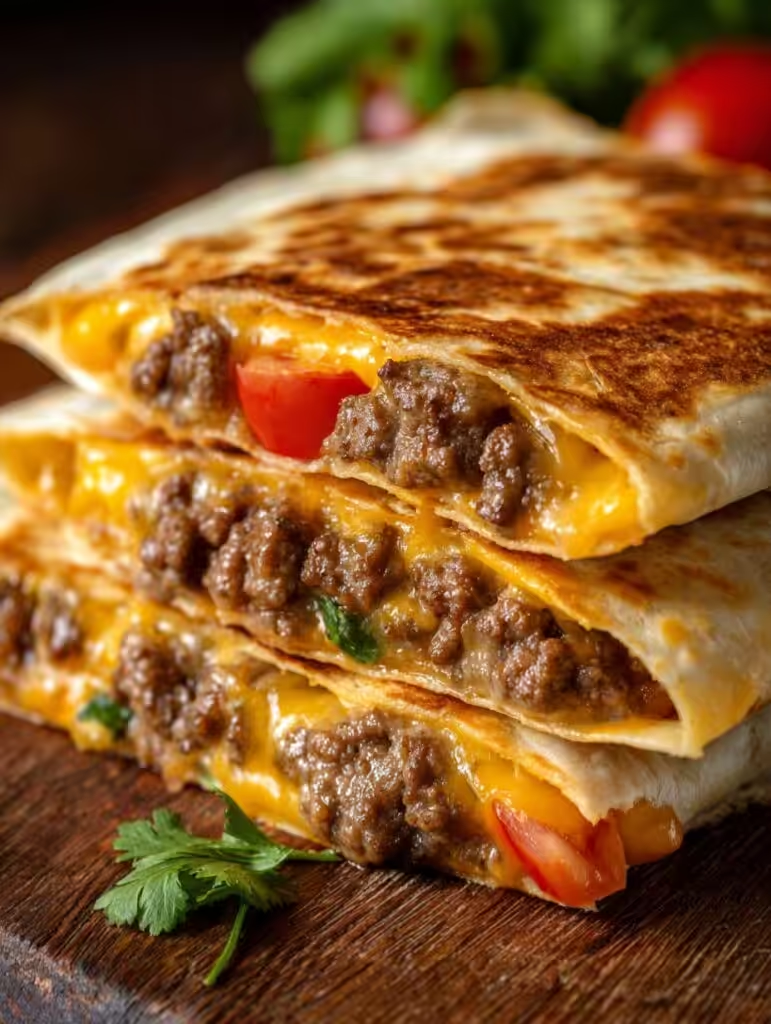
Welcome to the Cheeseburger Quesadilla. This isn’t just a novelty mashup; it is a weeknight dinner hero. In just 20 minutes, you can transform simple, fresh ingredients into a meal that satisfies the entire family, whether you are feeding picky toddlers or impressing friends during a game-day spread.
As a culinary strategist who has spent years testing the science of texture and flavor, I can tell you that the secret to a truly great cheeseburger quesadilla lies in two things: the “smash” technique for the beef and the perfect balance of melting cheeses. Over the years, I’ve refined this recipe to eliminate the common pitfalls—soggy tortillas, dry meat, or fillings that spill out the moment you take a bite.
In this guide, I’ll walk you through every step to achieve quesadilla perfection. We’ll cover the essential equipment, the science behind the crunch, clever substitutions for dietary needs, and variations that will keep this recipe in your weekly rotation for years to come. If you love the ease of a 20-minute meal and the flavor of a classic burger, you are in the right place.
Why This Cheeseburger Quesadilla Recipe Works
To create a high-authority recipe, we must understand the “why” behind the steps. This isn’t just about slapping beef and cheese between tortillas; it is about engineering a harmonious bite.
1. The Smash Burger Technique
The foundation of a great burger flavor is the Maillard reaction—the browning of the meat that creates a complex, savory depth. By rolling the ground beef into balls and pressing them flat into a hot skillet before adding the tortilla, we maximize the surface area touching the heat. This creates a thin, crisp layer of caramelized beef that mimics the texture of a smashed burger patty. It also renders out excess fat efficiently, ensuring the tortilla stays crisp rather than greasy.
2. The Cheese Barrier
One of the biggest issues with quesadillas is the tortilla absorbing moisture from the filling, leading to sogginess. We solve this with a cheese barrier. By melting a layer of cheese directly onto the tortilla before adding the beef, we create a waterproof seal. The cheese acts as a lamination layer, keeping the tortilla crunchy while ensuring every bite is filled with gooey, stretchy goodness.
3. The Sauce
A dry cheeseburger is a sad cheeseburger. While traditional burgers rely on ketchup and mustard, our quesadilla sauce is a creamy, tangy, non-alcoholic blend that mimics the flavor of a “secret sauce.” It binds the ingredients together without making the tortilla wet, providing moisture and acidity to cut through the richness of the beef and cheese.
Essential Equipment for Quesadilla Success
Before we preheat the stove, having the right tools ensures the process is seamless. You likely have everything you need in your kitchen already.
- Large Non-Stick Skillet or Griddle: A 12-inch skillet is ideal. A flat-top griddle allows you to cook two quesadillas simultaneously.
- Spatula: A sturdy, wide metal or heavy-duty nylon spatula is crucial for pressing the meat and flipping the quesadilla without tearing the tortilla.
- Cheese Grater: Pre-shredded cheese often contains anti-caking agents (like cellulose) that prevent it from melting smoothly. Grating your own cheese guarantees that creamy, unified melt.
- Pastry Brush: For brushing oil or butter onto the tortillas to achieve that golden-brown crispiness.
Ingredients & Substitutions
To make this recipe accessible, I’ve broken down the ingredients with common substitutions to accommodate various dietary needs without compromising on texture or flavor.
For the Filling:
- 1 lb Ground Beef (80/20 blend): The 80/20 (meat-to-fat ratio) is essential for flavor and the smash technique. The fat provides the necessary sizzle.
- Substitution: Ground turkey, ground chicken, or plant-based ground meat (like Impossible or Beyond) work wonderfully. For plant-based, add a teaspoon of oil to the pan to mimic the fat render.
- 4 large Flour Tortillas (10-inch): Flour tortillas are preferred for quesadillas because they are pliable, have a high fat content, and crisp up beautifully.
- Substitution: Gluten-free flour tortillas are widely available. Corn tortillas can be used but are smaller and more brittle; you may need to layer two.
- 8 oz Sharp Cheddar Cheese: Sharp cheddar provides that classic cheeseburger tang and melts beautifully.
- Substitution: Monterey Jack (for extra meltiness), Colby Jack, or a dairy-free shredded cheese (look for brands that specifically melt well, such as those based on oat or coconut oil).
For the Sauce:
- 1/2 cup Mayonnaise: The creamy base.
- 2 tbsp Ketchup: Adds sweetness and tang.
- 1 tbsp Yellow Mustard: Provides the signature “burger” tang.
- 1 tbsp Dill Pickle Relish: Adds texture and acidity.
- 1 tsp Onion Powder
- 1/2 tsp Smoked Paprika
For Assembly & Toppings:
- 2 tbsp Butter or Neutral Oil: For crisping the tortillas.
- 1/2 cup Dill Pickle Slices: Essential for that authentic burger bite.
- 1/2 cup Shredded Iceberg Lettuce: Iceberg provides the necessary crunch without wilting quickly.
- 1/4 cup Yellow Onion, finely diced: Optional, for a raw bite.
Step-by-Step Instructions for the Perfect Crunch
Follow these steps closely to ensure your Cheeseburger Quesadilla turns out perfectly every time. We will be building two large quesadillas.
H3: Step 1: Prepare the Signature Sauce
In a small bowl, combine the mayonnaise, ketchup, yellow mustard, dill pickle relish, onion powder, and smoked paprika. Whisk until smooth. This sauce can be made ahead of time and stored in the refrigerator for up to a week. Set aside.
H3: Step 2: The Smash Technique
- Divide the ground beef into 4 equal balls (about 4 ounces each).
- Heat your large non-stick skillet or griddle over medium-high heat. You want it hot enough to sizzle the meat immediately.
- Place two of the beef balls into the skillet, leaving plenty of space between them.
- Using your sturdy spatula, press down firmly on each ball, smashing it into a thin patty. The patties should be slightly larger in diameter than your tortillas (about 7-8 inches).
- Season the tops with salt and pepper. Let them cook undisturbed for 2-3 minutes until a deep brown crust forms. Flip and cook for 1 minute more.
- Remove the patties to a plate. Repeat with the remaining two beef balls. Note: The patties will be cooked through and crispy around the edges.
H3: Step 3: Assembly Strategy
- Lower the heat to medium. Wipe out any excess fat from the pan, leaving just a thin layer.
- Brush one side of each tortilla with melted butter or oil. This is the side that will face the pan.
- Place one tortilla, butter-side down, into the skillet.
- Immediately sprinkle a generous handful of shredded cheddar cheese (about 1/4 of the total) over the entire tortilla. This is the cheese barrier.
- Place two of the smashed beef patties on top of the cheese. Break them apart if needed to cover the surface.
- Sprinkle another layer of cheese on top of the beef. This “top cheese” layer acts as the glue to hold the top tortilla in place.
- Place the second tortilla on top, with the buttered side facing up.
H3: Step 4: Griddling to Golden Perfection
- Cook the quesadilla for 2-3 minutes, or until the bottom is golden brown and crispy, and the cheese has begun to melt.
- Carefully flip the quesadilla using your spatula. You may need to support it with your hand or a second spatula to prevent the filling from sliding out.
- Cook for another 2-3 minutes, pressing down gently with the spatula to ensure even browning and to “seal” the layers.
- Remove the quesadilla from the pan. Repeat the process for the second quesadilla.
H3: Step 5: Resting and Serving
Let the quesadillas rest on a cutting board for 1-2 minutes before slicing. This allows the cheese to set slightly, preventing it from oozing out the moment you cut it. Slice into triangles using a sharp knife or a pizza cutter.
Expert Tips for the Ultimate Texture
Achieving the perfect texture is the difference between a good quesadilla and a great one. Here are the insider secrets:
- Don’t Overfill: It is tempting to pile on the fillings, but overfilling leads to blowouts. Stick to the recommended amounts to ensure the tortillas can seal properly.
- Drain Your Toppings: If you are adding pickles or onions inside the quesadilla (rather than on top), pat them dry with a paper towel. Excess moisture is the enemy of a crisp tortilla.
- Medium Heat is Key: If the heat is too high, the tortillas will burn before the cheese melts. If it’s too low, the tortillas will absorb oil and become soggy. Medium heat provides the “Goldilocks” zone.
- Resting is Non-Negotiable: Just like a steak, a quesadilla needs to rest. Cutting it immediately causes the steam to escape rapidly, making the edges soggy. Let it rest, and the interior steam will redistribute.
Delicious Variations to Keep It Fresh
This recipe serves as a perfect base for creativity. Here are three variations that maintain the 20-minute prep time while offering new flavor profiles.
1. Spicy Jalapeño Popper Style
- Modification: Add 2 sliced jalapeños (fresh or pickled) and 4 oz of cream cheese (cubed) to the filling.
- Why it works: The cream cheese adds a rich, tangy creaminess that complements the sharp cheddar, while the jalapeños provide a spicy kick that cuts through the richness of the beef.
2. Southwestern Black Bean (Vegetarian)
- Modification: Replace the ground beef with 1 can of black beans (rinsed, drained, and smashed slightly) mixed with 1 tsp of cumin and 1 tsp of chili powder. Add corn kernels for sweetness.
- Why it works: This variation keeps the “hearty” texture of a burger but adds fiber and a smoky, earthy flavor profile. It is a fantastic meatless Monday option that still delivers on protein and satisfaction.
3. Mushroom Swiss Melt
- Modification: Replace the cheddar with shredded Swiss cheese. Sauté 8 oz of cremini mushrooms in butter until deeply browned and any liquid has evaporated. Add the mushrooms to the quesadilla with the beef.
- Why it works: This variation elevates the dish to a more sophisticated level. The earthy umami of the mushrooms pairs perfectly with the nutty, mild flavor of Swiss cheese, mimicking a high-end burger experience.
Serving Suggestions and Presentation
While this Cheeseburger Quesadilla is a complete meal on its own, the right accompaniments can elevate the dining experience.
- Classic Diner Style: Serve with a side of crispy french fries, sweet potato fries, or a simple side salad tossed in a light vinaigrette. Offer extra sauce for dipping.
- Game Day Spread: Cut the quesadillas into smaller, bite-sized wedges. Arrange them on a platter with small bowls of extra sauce, sour cream, and guacamole. This makes for an incredibly popular party appetizer that disappears quickly.
- The “Big Mac” Style: Drizzle the top of the sliced quesadilla with a zig-zag of the signature sauce and a sprinkle of sesame seeds. This adds visual appeal and reinforces the burger aesthetic.
How to Store and Reheat
One of the best things about this recipe is that it holds up well for leftovers, making it perfect for meal prep.
- Refrigeration: Store leftover slices in an airtight container in the refrigerator for up to 3 days.
- Reheating for Crispiness: Avoid the microwave. It will turn the tortilla rubbery. Instead, reheat in a dry skillet over medium-low heat for 2-3 minutes per side until warmed through and the exterior is crispy again. Alternatively, an air fryer at 350°F for 3-4 minutes works wonders.
Frequently Asked Questions
Can I make this recipe dairy-free?
Absolutely. Use a high-quality dairy-free shredded cheese (such as Violife or Daiya) and a vegan mayonnaise for the sauce. Ensure the tortillas you buy are also dairy-free, as some contain milk solids.
How do I prevent the tortilla from breaking when I flip it?
Use a large, sturdy spatula and support the top of the quesadilla with your other hand. If you are concerned, you can use a second skillet to press down on top of the quesadilla, then invert the whole thing onto a plate to flip. This is often easier for beginners.
What if I don’t have ground beef?
This recipe is highly adaptable. Thinly sliced steak (like ribeye), shredded rotisserie chicken, or even crispy bacon bits can replace the ground beef. Just ensure any protein is pre-cooked before assembling the quesadilla.
A Call to Action
I hope this guide empowers you to make the best Cheeseburger Quesadilla of your life. It’s a recipe built on technique, love, and the universal craving for comfort food. I’d love to hear how yours turns out!
Did you try this recipe? Please leave a rating and comment below to let me know your favorite variation. If you share a photo on social media, be sure to tag me so I can see your beautiful creation. Happy cooking!
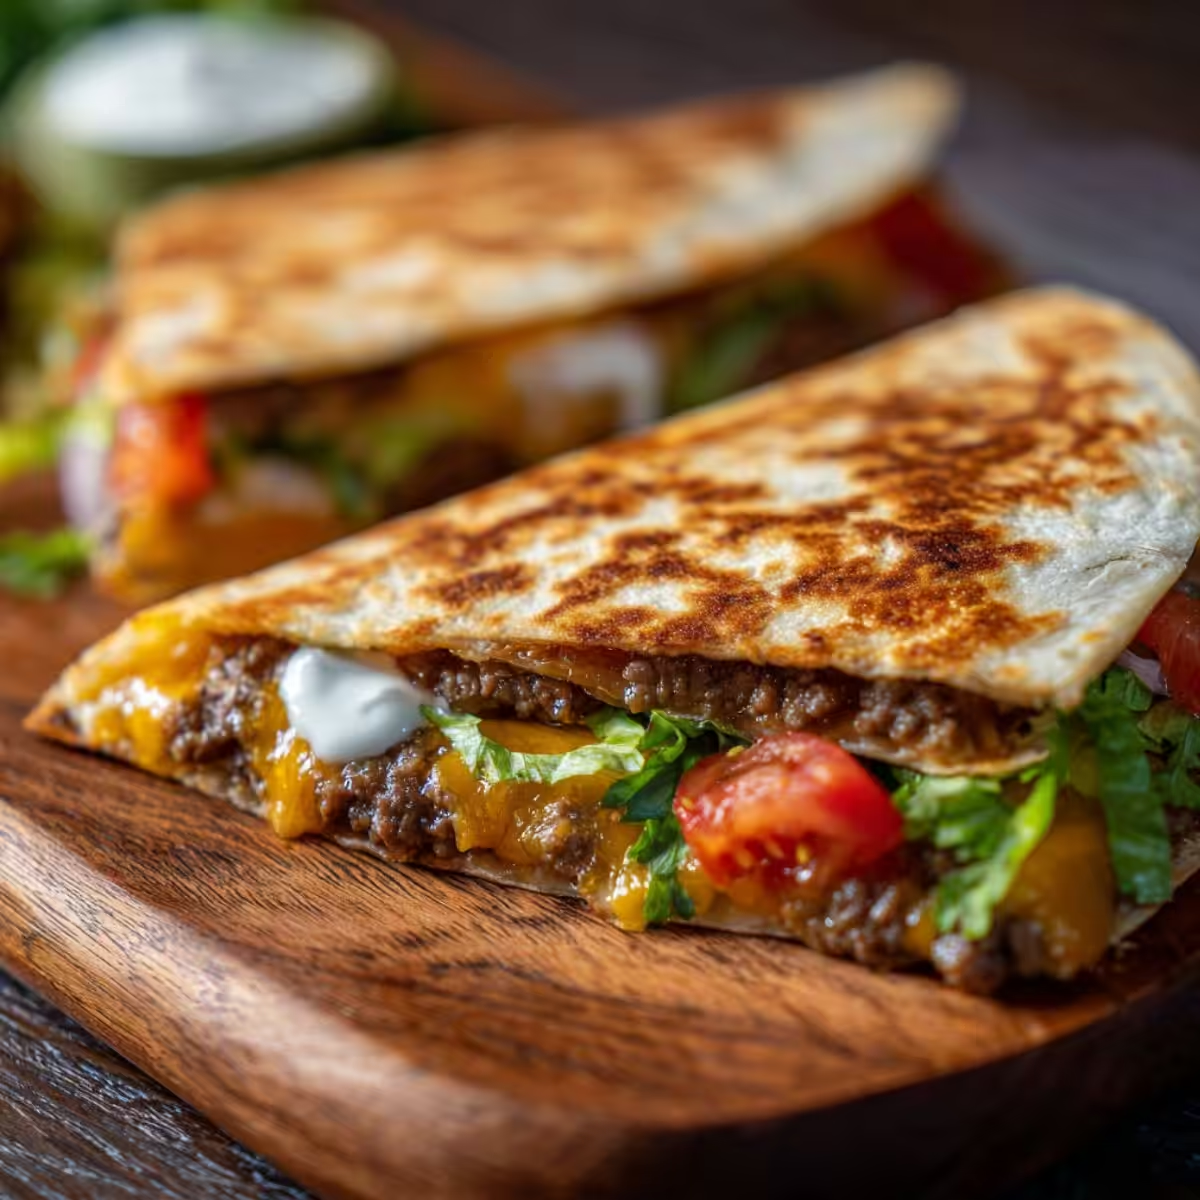

Ultimate Cheeseburger Quesadilla
Ingredients
Equipment
Method
- In a small bowl, combine mayonnaise, ketchup, mustard, relish, onion powder, and smoked paprika. Whisk until smooth and set aside.
- Divide ground beef into 4 equal balls. Heat a large skillet over medium-high heat. Place two beef balls in the pan and smash flat with a spatula. Season with salt and pepper. Cook for 2-3 minutes until a crust forms, flip, and cook for 1 more minute. Remove to a plate and repeat with remaining beef.
- Reduce heat to medium. Brush one side of each tortilla with butter. Place one tortilla butter-side down in the skillet. Sprinkle a layer of cheese, top with two smashed patties, add another layer of cheese, and cover with the second tortilla (butter-side up).
- Cook for 2-3 minutes until bottom is golden brown. Carefully flip and cook for another 2-3 minutes, pressing gently, until cheese is melted and the other side is crispy.
- Remove from pan. Let rest for 2 minutes. Slice into wedges. Serve with the prepared sauce, lettuce, pickles, and onions.